
Apply Vinyl Decal To A Shipping Container EVEN IN COLD WEATHER
We apply vinyl decals to shipping containers all of the time at The Container Guy, and we want to share with you all we have learned to make the application as easy as possible, even in the cold!
We recommend, when ordering a vinyl die cut decal for your shipping container, you ask your graphic designer to add 7% width to the sticker. This way, when you step back, your decal will appear exactly how you want it to over the container corrugations.
Purchase Container Modification World Products Featured in The Video
How to Install a Vinyl Die-Cut Decal on a Shipping Container in Cold Weather
In this walkthrough, Channing McCorriston, The Container Guy, demonstrates how to properly install a vinyl die-cut decal on a shipping container, even in freezing temperatures.
Applying vinyl to steel in cold conditions requires careful surface preparation, precise alignment, and controlled application to ensure long-term adhesion and a professional finish.
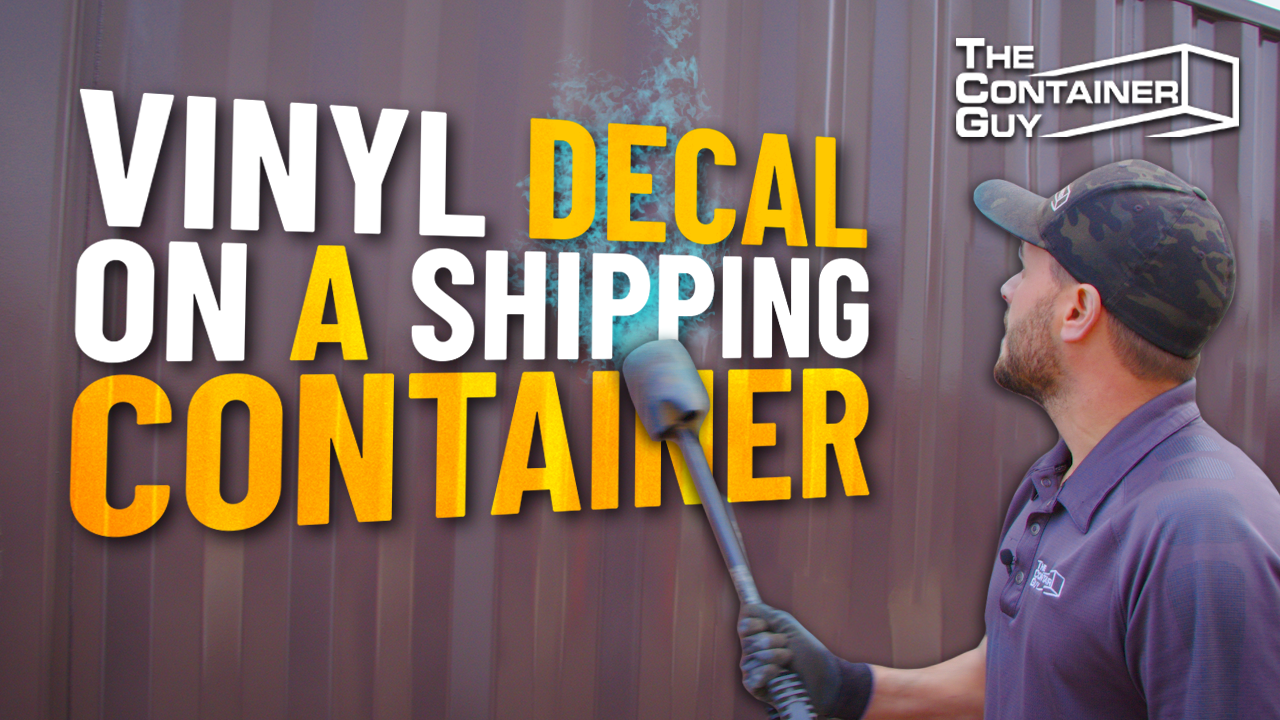
Step 1: Prepare the Steel Surface
Cold steel is the biggest challenge when installing decals in winter.
For proper adhesion, the container surface must be warmed to approximately room temperature. A tiger torch can be used to gently heat the steel. On frosty mornings, you will often see moisture appear as the metal warms, which then evaporates as the temperature rises.
It is important not to overheat the surface. Painted steel can be damaged if it becomes too hot, potentially causing the paint to shrivel. The correct temperature is warm to the touch but not hot.
Proper heating significantly improves adhesive bonding and makes the application process smoother.
Step 2: Position and Align the Decal
Alignment is the most important part of the installation.
Start at the left edge and work across the container. Use painter’s tape to temporarily secure one edge of the decal in place. This prevents shifting while you confirm the positioning.
To ensure the decal is straight and level, align it with a consistent reference point. You can use a weld seam or measure down from the top tubing of the container to maintain even spacing.
If the starting edge is crooked, the entire decal will be misaligned. Taking extra time at this stage prevents compounding errors later.
Step 3: Apply the Vinyl
Once alignment is confirmed, peel back the protective backing from the starting edge.
Using a squeegee, begin pressing the vinyl onto the steel while pushing air bubbles outward. Work slowly and methodically, applying steady pressure to ensure smooth adhesion.
Gradually peel away more of the backing as you move across the surface. Avoid rushing. Controlled application reduces the risk of wrinkles and trapped air pockets.
Working with Corrugated Surfaces
Shipping containers are not flat. Their corrugated walls create a visual and installation challenge.
To compensate for the depth of the corrugations, the decal should be made approximately 7 percent wider than it would be for a flat surface. This ensures the lettering appears proportionate when viewed from a distance.
When applying vinyl over corrugations, press firmly into the grooves using the squeegee to eliminate air gaps and ensure proper contact.
Final Touches
After the entire decal is applied:
-
Go over the surface again with the squeegee
-
Pay special attention to inside corners and corrugation valleys
-
Carefully remove the pre-masking tape
When peeling off the masking layer, do so slowly from one side. This prevents lifting delicate elements of the design, especially fine logo details.
Proper surface heating beforehand makes this final step significantly easier and reduces the risk of lifting.
Choosing the Right Look
In this installation, black vinyl was applied to a similarly dark-painted container. The result is subtle and professional, adding branding without overpowering the container’s appearance.
Color choice plays a big role in overall presentation, particularly for commercial branding.
Key Takeaways
-
Always warm the steel surface in cold weather
-
Do not overheat painted surfaces
-
Take extra time to align the decal straight and level
-
Use painter’s tape to secure positioning before applying
-
Increase decal width by about 7 percent for corrugated walls
-
Use a squeegee to remove air pockets
-
Remove masking tape carefully to protect fine details
Final Thoughts
Installing vinyl decals on shipping containers in cold weather is completely achievable with the right preparation and technique.
By controlling surface temperature, ensuring precise alignment, and working methodically across corrugated steel, you can achieve a clean, durable, and professional result that enhances your container branding.